An IoT Mastery Project guide series
Install MS Code and PlatformIO on Mac OS
In this article, I'll show you how to install PlatformIO and MS Code on your Mac OS.
In this article, I'll show you how to install PlatformIO and MS Code on your Mac OS.
If you're using Windows 10, please check out the next article in this series.
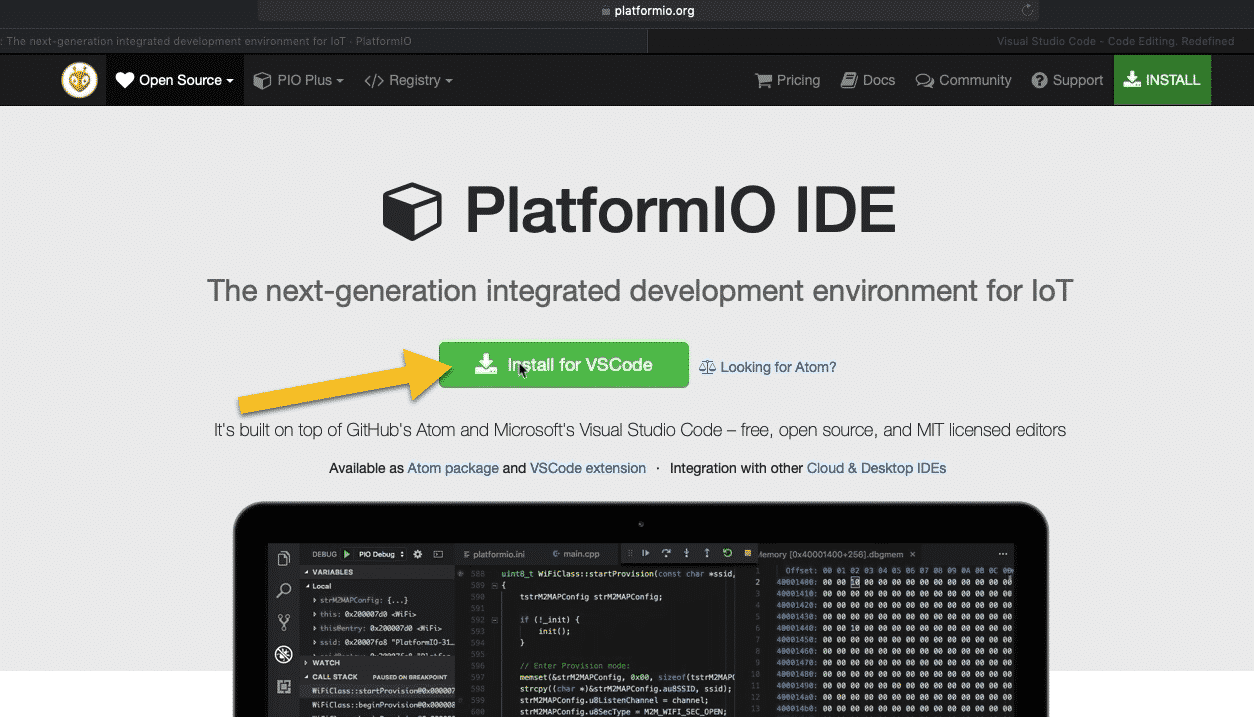
To begin with go to PlatformIO.org.
Click on the large green button “Install PlatformIO Now”.
A new page will come up, where you have the option to download PlatformIO with two editors: VSCode (MS Code) and Atom.

The PlatformIO download page
I've used both of them and had a bit of time to compare them. What I really like about Visual Studio Code is how well integrated it is with PlatformIO. Atom is also well integrated but not as well as Visual Studio Code.
If you scroll further down in this page, you will see a side-by-side comparison between the two editors. Visual Studio Code ticks all the boxes.
For the purposes of this course, I'm going to use Visual Studio Code.
Go ahead, download the PlatformIO installer for VSCode.
When the download is complete, expand the archive and move the file into your Applications folder.
That’s it, PlatformIO and MS Code is installed.
Now, start it by double-clicking on the Visual Studio Code application file.
The Code application icon
Accept the security pop-ups.
When code starts, it will look like this:
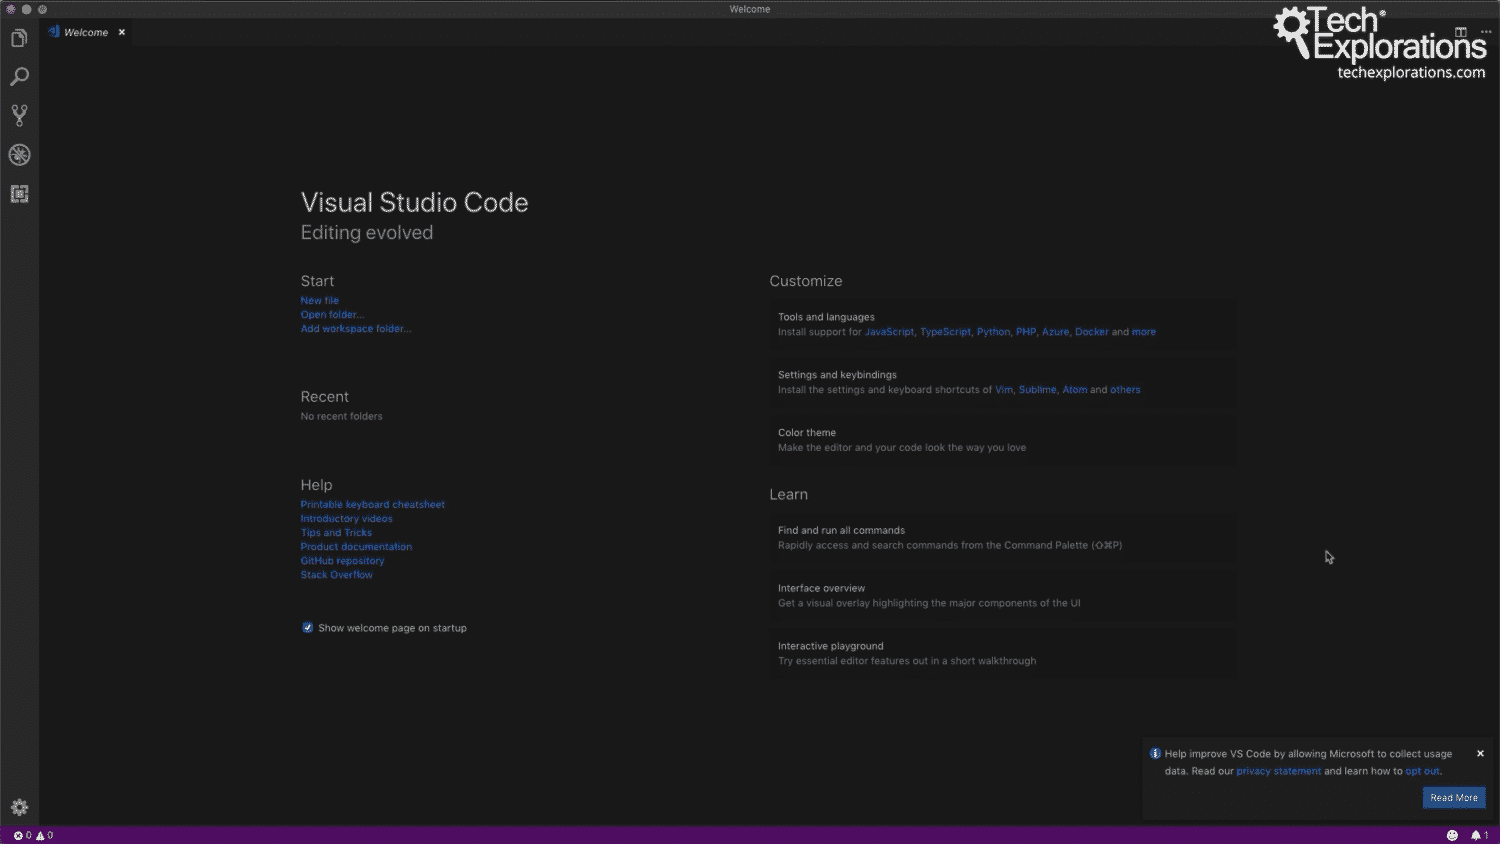
MS Visual Code, just started
Now that I've got Visual Studio Code installed, the next thing I to do is to install a PlatformIO.
From the left sidebar, click on the first button from the bottom. This will bring up the "extensions" pane.
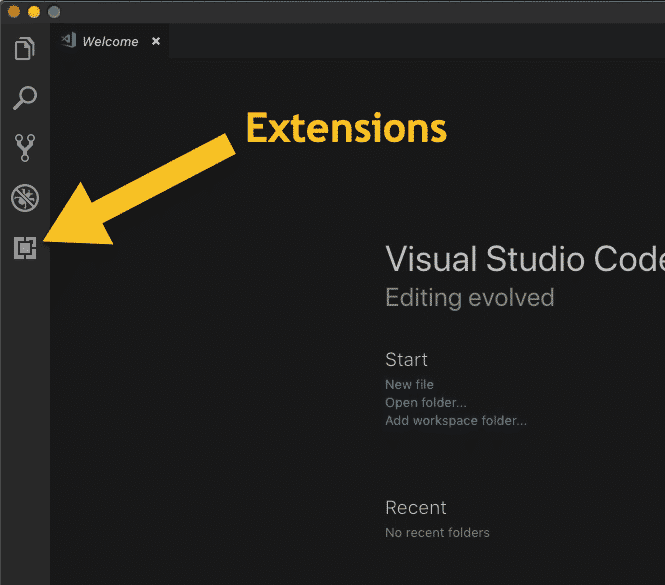
Click on the Extensions button to install PlatformIO
In the search box, type "PlatformIO" (1).
The first item in the list is “PlatformIO IDE”, version 1.7.1.
Click on that PlatformIO IDE to display its information in the right pane (2).
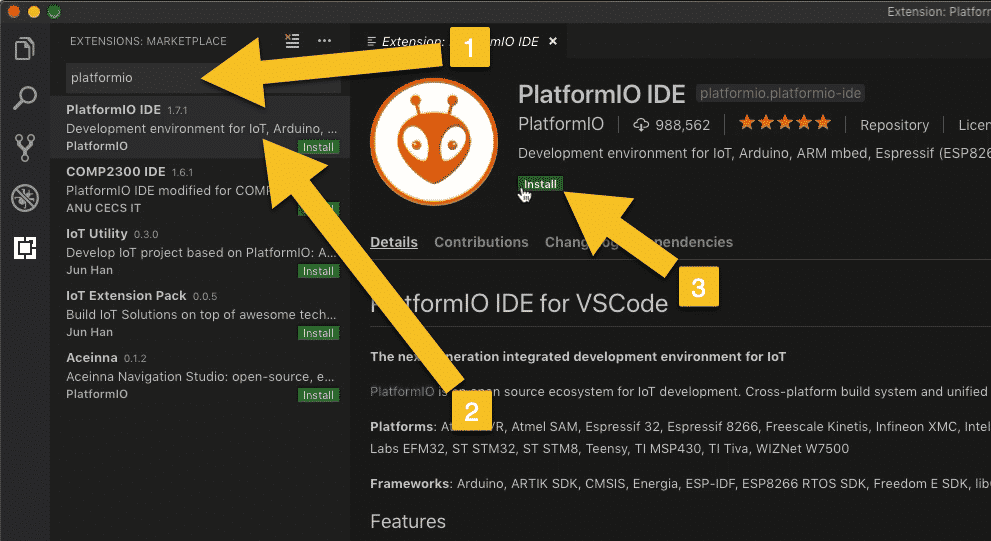
Click on Install, to download and install PlatformIO
Then, click on the “Install” button (3).
Please note that at the time that I'm recording this, PlatformIO IDE version 1.8.0 has been released. However, I have discovered that there is an incompatibility between PlatformIO version 1.8.0, and one of the libraries I'm using in this project. At the time I am writing this, that incompatibility has not been fixed. Therefore, I'll be using version 1.7.0 of PlatformIO.
This download and installation process will take a few minutes.
When it is complete, you will see the new PlatformIO tab.
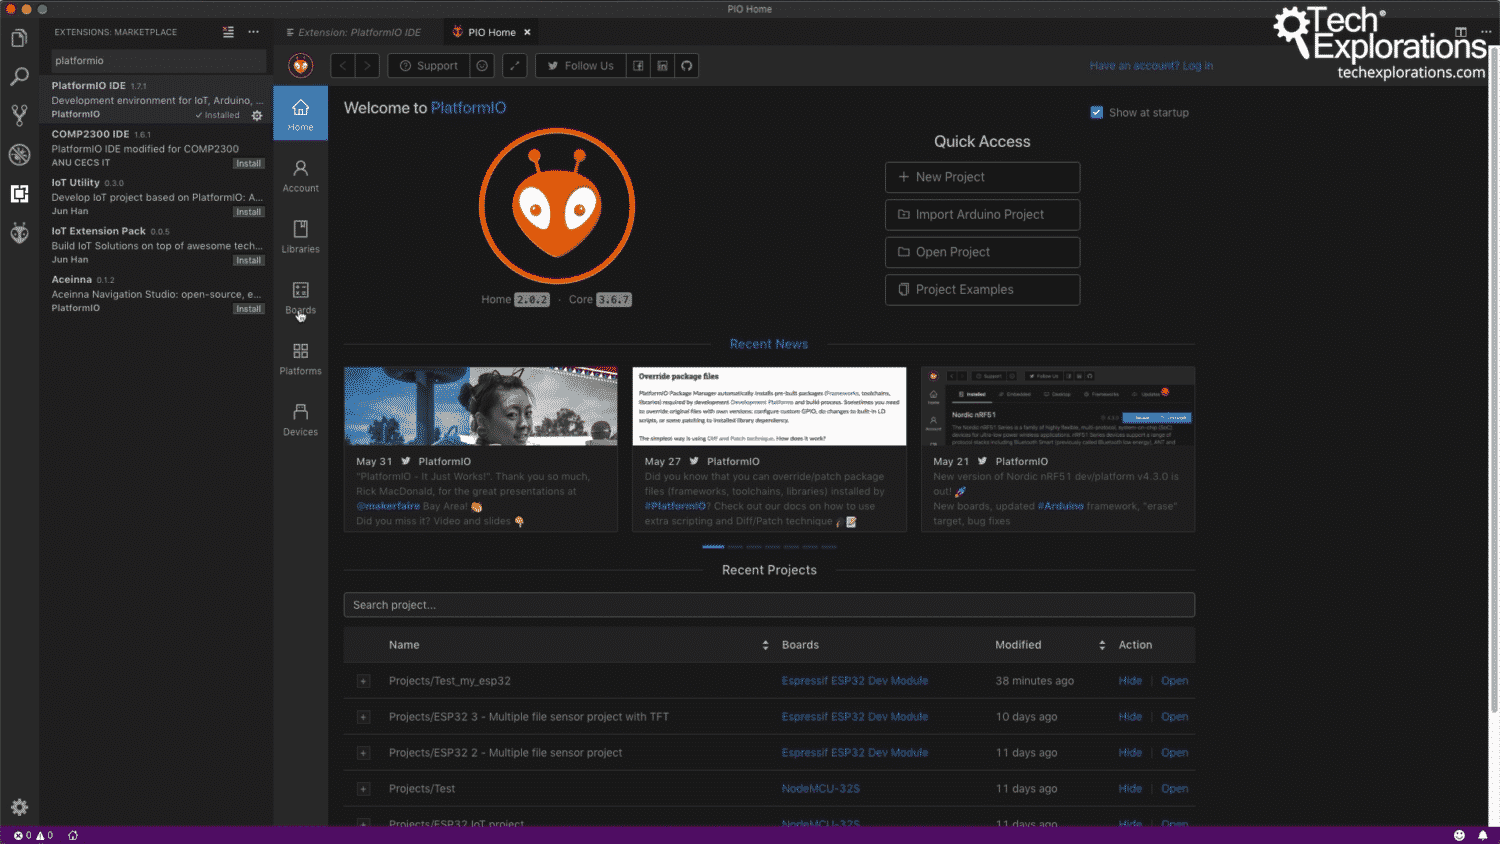
PlatformIO is installed in MS Code
This tab contains the functions that are relevant to PlatformIO projects.
At this point, you have completed the installation of PlatformIO and Code.
The panes on the left side are dedicated to Visual Studio Code.
The panes on the middle and right part of the window are dedicated to PlatformIO projects.
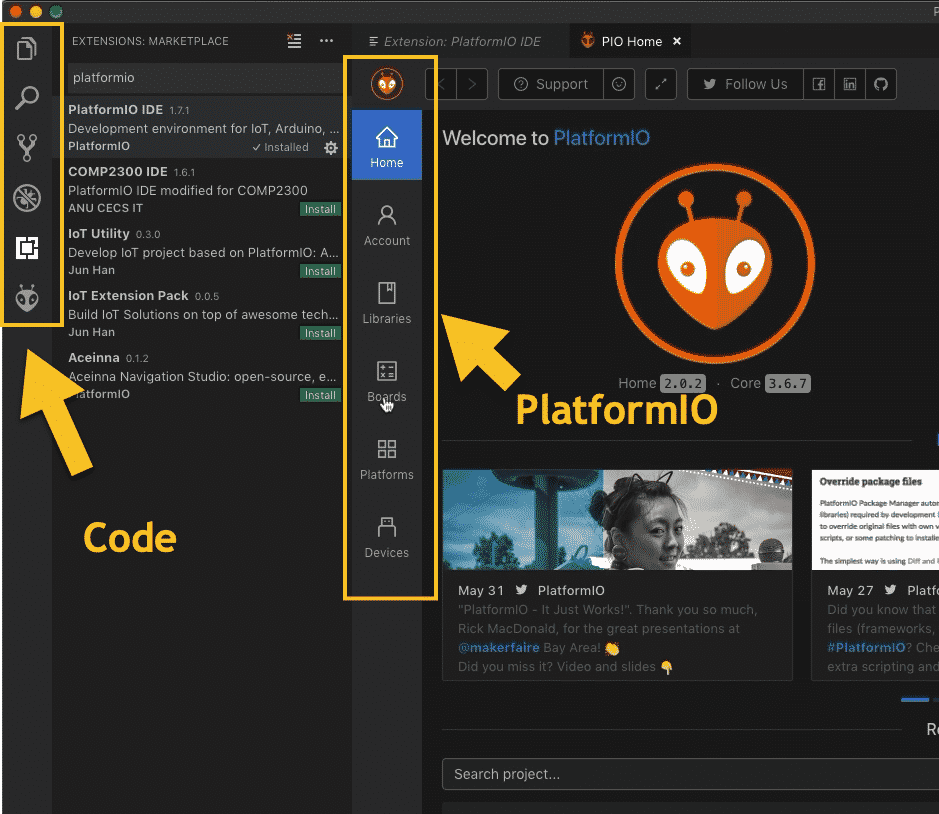
The user interface contains functionalities dedicated to the editor (MS Code) and the IDE (PlatformIO)
In ESP32 Unleashed, you can find a lecture dedicated to a walkthrough of the most important user interface components of PlatformIO and of Visual Studio Code.
For now, let’s test what we have with a new, very simple project. In the PIO Home tab, click on the “+ New Project” button.
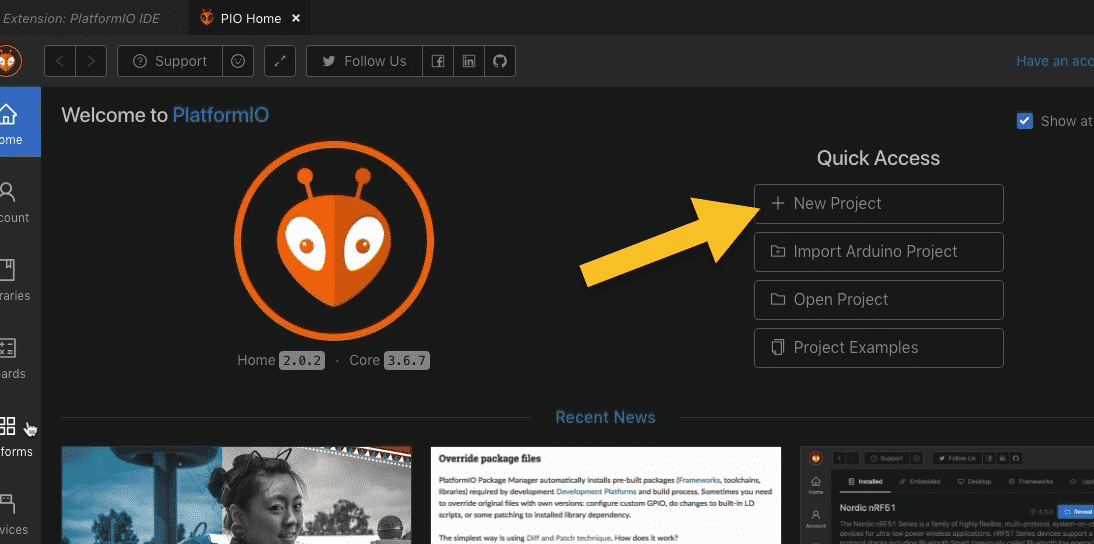
Start a new project
Give this new project a name.
Let's call it "ESP32_test" (1).
Not very creative name, I know.
The target device for this project is my ESP32 dev kit.
In the Board field, search for "ESP32" and see what's available. There's a lot of boards available that fit the term I searched for. The one that I matches exactly my board is the generic Espressif ESP32 dev module, so select that from the list (2).
Last, the board I selected has support for two frameworks. The first one is ESP IDF, that Espressif provides. The second one is the Arduino framework. I will be using the Arduino framework in this course, so select "Arduino" (3).
As for the location where the project files will be saved, let's use the default location (4).
Click on "finish" to create the project (5).
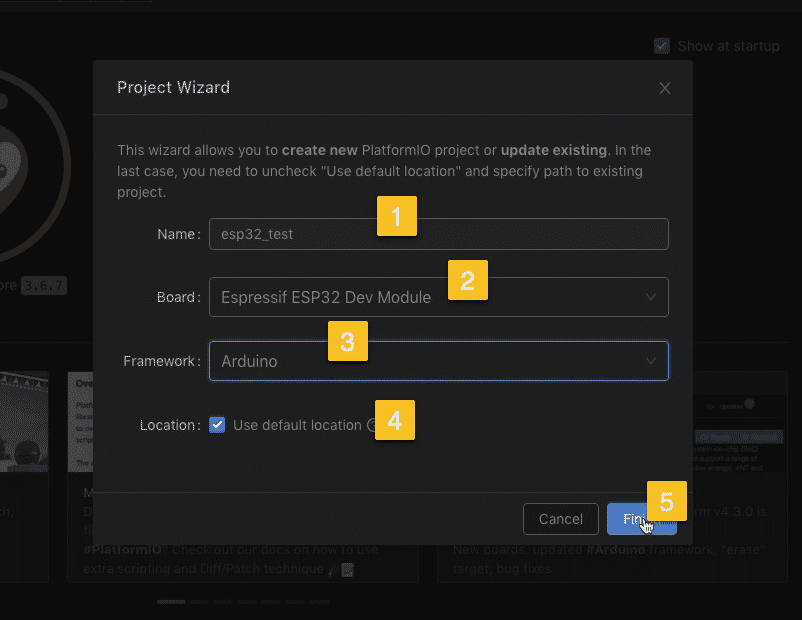
Setup your new project with the Project Wizard
PlatformIO is going to download all the necessary files for this project.
Within a few seconds, your new project will be ready. Code will show you the contents of the project in the left pane.
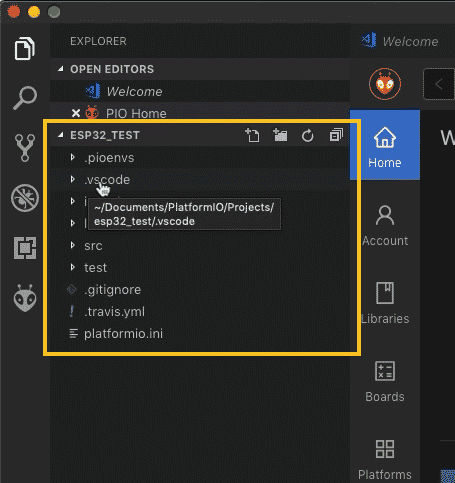
You new project is ready
Inside the project directory, are several sub-directories.
For example, there’s ".pioenvs", ".vscode", ".includes", and "libraries". You can find information about the role of each one in the documention. I also discuss them in detail in ESP32 Unleashed.
Go in the "src" directory (your project’s source code directory). There, you will find a single file. titled "main.cpp".
Double-click on that file to open it.
Let’s write a very simple program. All that this program does is to blink the built-in LED on the board and send some text to the serial monitor.
Copy this program in your main.cpp:
#include <Arduino.h>

void setup() {

Serial.begin(9600);

pinMode(2,OUTPUT);

}

void loop() {

digitalWrite(2,HIGH);

Serial.println(“ON”);

delay(500);

digitalWrite(2,LOW);

Serial.println(“OFF”);

delay(500);

}
Save your changes.
Connect the ESP32 dev kit to the computer via USB.
Let's compile it and upload it manually.
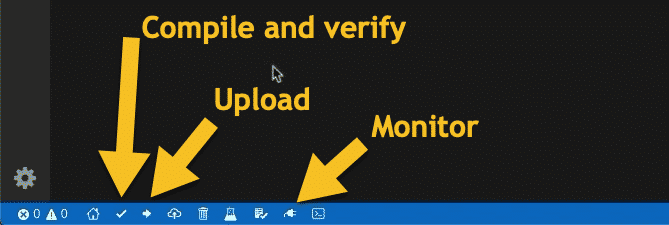
You'll be using these three buttons a lot
Click on the tick button to compile and verify the project.
At the end of the compilation, you should see the green “SUCCESS” message.
If you did, click on the right arrow button to upload the firmware to the board.
PlatformIO should be able to detect the port where your ESP32 is connected.
If the programm is not uploading to your ESP32, try pressing and holding down the button on the left side of the USB connector on the board, to place it in upload mode. In some boards, this button is marked as “OOI”
When the firmware is uploaded, you should see the on-board LED blinking.
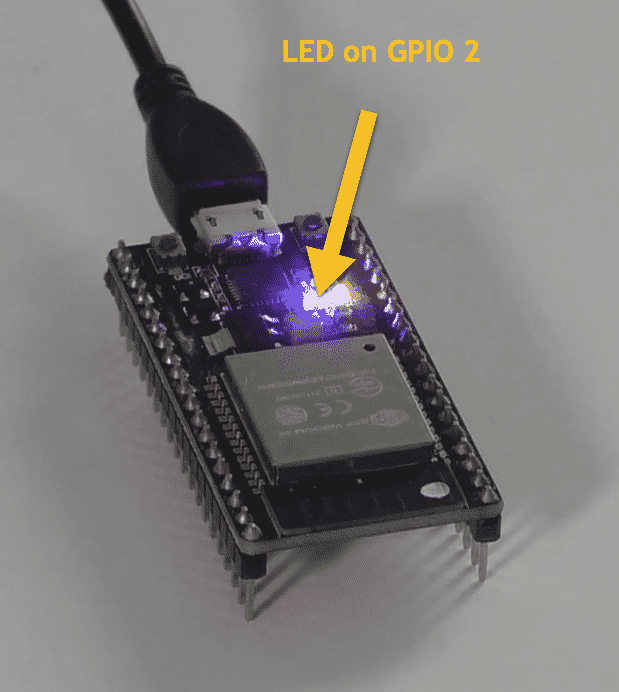
Programmed using PlatformIO!
To see the text coming through the Serial monitor, click on the Monitor button.
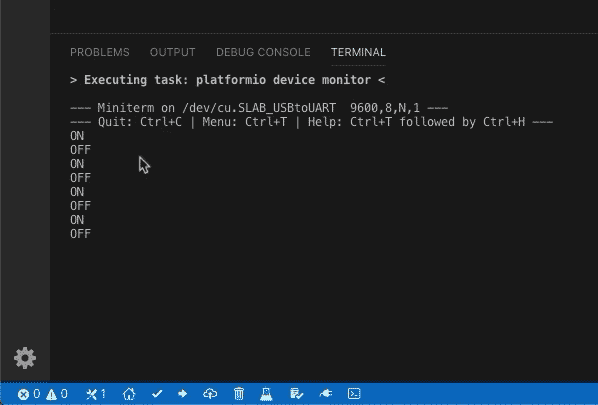
Serial monitor output
The Serial monitor shows the text coming from the device: "On", "Off", etc.
In the platformio.ini file, you can specify other functional details of your project, such as the USB port to which the device is connected.
If you know the name of the port to which your device is connected, then you can include this information in the configuration file so that PlatformIO can save a little bit of time detecting this automatically.
You can also specify the communication speed.
My configuration file looks like this:
[env:esp32dev]

platform = espressif32@1.7.0     ; Available versions https://github.com/platformio/platform-espressif32/releases

board = esp32dev

framework = arduino

; Custom Serial Monitor port

monitor_port = /dev/cu.SLAB_USBtoUART

; Custom Serial Monitor speed (baud rate)

monitor_speed = 9600
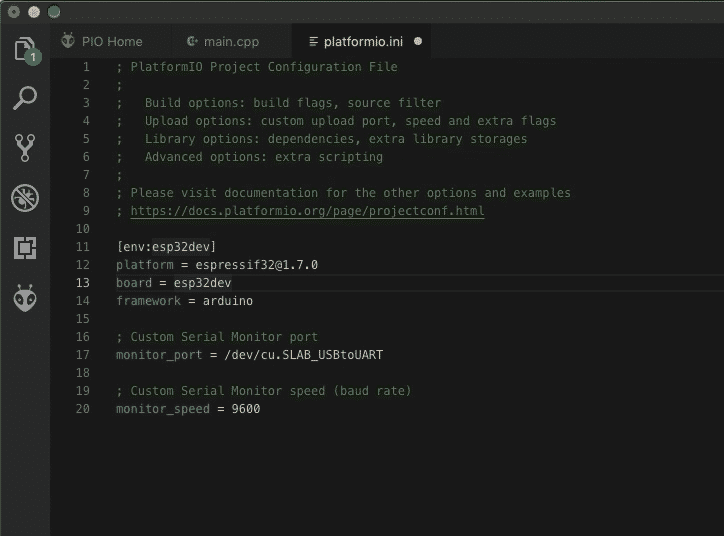
Project configuration file
Notice that I have also specified the exact version of the platform I want to use, 1.7.0. You can do the same with the framework and the libraries, all of which are project dependencies. I will make good use of this feature in ESP32 Unleashed.
Use the at "@" symbol and then the version that you want to target.
Compile again, make sure that all this works and that there are no mistakes.
If you are planning to use PlatformIO on Windows 10 then also check out the next article in which I show you how to do the installation on Windows 10.
Ready for some serious learning?
Enrol to
ESP32 Unleashed
A new learning adventure awaits you.
Create an application that will stretch your existing knowledge and skills.
ESP32 Unleashed is a project course
This course is perfect for people familiar with the ESP32, especially graduates of ESP32 For Busy People.
It is a guided project, designed to teach you how to use modern tools to create modern embedded applications based on the ESP32.
Just click on the big red button to learn more.
Jump to another article
Lessons
1: Why use PlatformIO to program the ESP32?
2: How to install PlatformIO and MS Code (Mac OS)
3: How to install PlatformIO and MS Code (Windows 10)
4: Set up an ESP32 project in PlatformIO
5: Upload and test the new project
6: Create the Git repository
7: Split the program into two files
8: Test the multi-file project
9: How to use Git version control
We publish fresh content each week. Read how-to's on Arduino, ESP32, KiCad, Node-RED, drones and more. Listen to interviews. Learn about new tech with our comprehensive reviews. Get discount offers for our courses and books. Interact with our community. One email per week, no spam; unsubscribe at any time
