INTRODUCTION TO THE ARDUINO GUIDE SERIES
Types of hardware that you can connect to an Arduino board
In this lesson, we’re going to dive into the types of hardware that you can connect to an Arduino board.
In the previous lesson, you learned about the most common Arduino boards, and some of the history of the development of the first few boards.
In this lesson, we’re going to dive into the types of hardware that you can connect to an Arduino board.
The Arduino can’t do much on its own. Its purpose is to communicate with external hardware and to control.
There are many different kinds of hardware that you can connect to the Arduino. And there are a lot of them! In this section, I will discuss the kind of components that you can connect to an Arduino, and give some examples for each.
First, a quick look at the hardware included on the Arduino Uno board. The Arduino Uno has features that are shared with other Arduino boards. I’m marking the most important ones in this image:
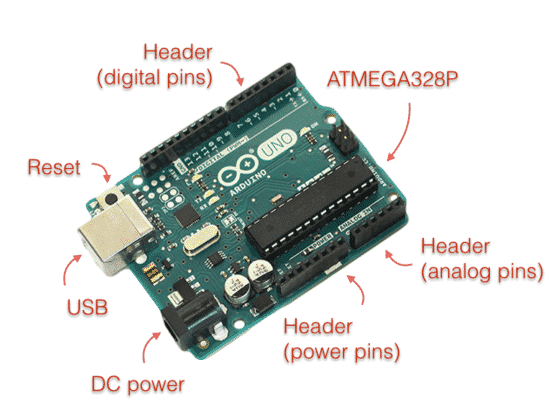
The most important features of the Arduino Uno board
Here are the details:
- USB: The port used to transfer data and programs to the Arduino. It is also used to power the Arduino.
- DC power: If you don’t connect the Arduino to the computer via the USB, you can power the Arduino by connecting a power supply or a battery pack to the DC power port.
- Reset: Press this button to make your program restart.
- Headers. There are four headers that expose pins. You can connect your peripherals to the Arduino using those pins.
- ATMEGA328P: This is the “brain” of the Arduino Uno, the microcontroller. It sits on a socket, so if needed, you can swap it for a new one.
You will learn more details about the Arduino later. For now, you know enough to continue in this lesson and learn about the basic kinds of hardware that you can connect to the Arduino.
A simple mind experiment
As you read the rest of this lesson, do not be discouraged if the details seem hard to grasp. Unless you already have some knowledge of Ethernet controllers, transistors, and the like, you will need to take your time and learn all this, one step at a time.
Before you continue, do this mind experiment. Imagine yourself six months from now. You have completed this course, and you have completed the ‘Arduino Step by Step Getting Started’ course. Perhaps you are a quarter into the ‘Arduino Step by Step Getting Serious’ course.
You have already created Arduino gadgets that can communicate with the Internet; other gadgets that display sensor data on an LCD screen. One of your gadgets can turn the fan on when it’s hot.
Your future self knows about shields, transistors, wifi modules, and LCD modules. You know how to write sketches to control all that, and to integrate them in a single working circuit. You feel confident that you can learn any new technology, and this confidence stems from your recent achievements.
Not only that, but your collection of boards and components has grown. Thanks to eBay, Aliexpress, Amazon, and many other international retailers and global trade, these components are really cheap to buy. You don’t need to take apart and reuse components constantly. Experiments never fail, and even if you burn out an LED, you can easily replace it and continue with the next experiment.
Now, come back to the present.
You are just starting out.
Don’t lose sight of your future self that you want to be.
Commit to the journey to take you there.
Shields Up!
Shields
An Arduino shield is a printed circuit board with various components already installed on it, ready to perform a particular function. They hook onto an Arduino without any wiring or soldering. Just align the shield with the Arduino, and apply a bit of pressure to secure them.
Most shields are built to work with the Arduino Uno, and as a result, virtually all other full-sized Arduinos have an Uno-compatible header configuration.
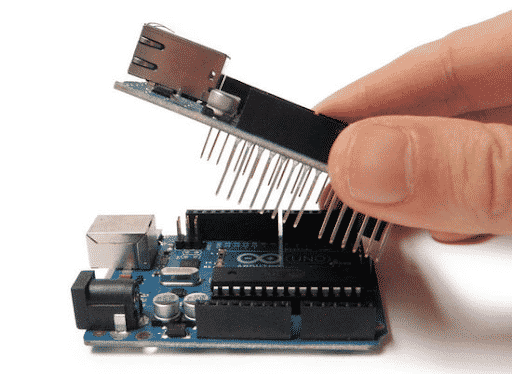
An example Arduino Uno shield. It fits perfectly in the Arduino Uno headers and adds capabilities without any jumper wires.
The Arduino Ethernet shield (top) is about to connect to an Arduino Uno (bottom). To make the connection, align the pins of the shield with the headers in the Uno and gently press down.
There are shields for almost anything: Ethernet and Wifi networking, Bluetooth, GSM cellular networking, motor control, RFID, audio, SD Card memory, GPS, data logging, sensors, color LCD screens, and more.
There are also shields for prototyping, with which you can make permanent any circuits you created on a breadboard and are too good to destroy.
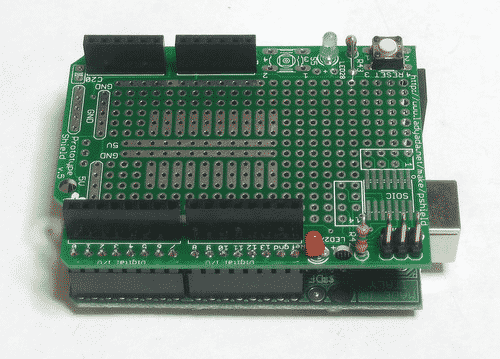
A prototyping shield has enough space and pads where you can attach your own components.
A prototyping shield like this one from Adafruit makes it easy to preserve your best circuit designs.
Shields are great for beginners because they require no tools to add components to an Arduino.
Breakouts
Breakouts are typically small circuit boards built around an integrated circuit that provides specific functionality. The board contains supporting circuitry, like a subsystem for supplying power, LEDs for indicating status, resistors and capacitors for regulating signals, and pads or pins for connecting the breakout to other components or an Arduino.
In many cases, the same functionality is offered in a shield or a breakout format. For example, you can get the same GPS as a breakout or as a shield. In such cases, the difference is size. The breakout is smaller; it can work with boards other than the Arduino Uno or Arduinos with the Uno headers.
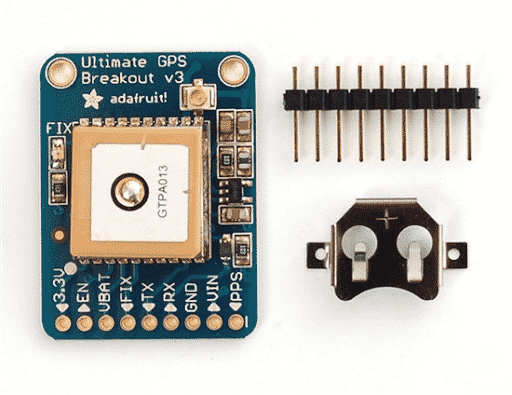
The Adafruit GPS Breakout. It comes with a header and a battery holder that you must solder on (image courtesy of Adafruit).
A breakout has to be wired to an Arduino using jumper wires and often a breadboard.
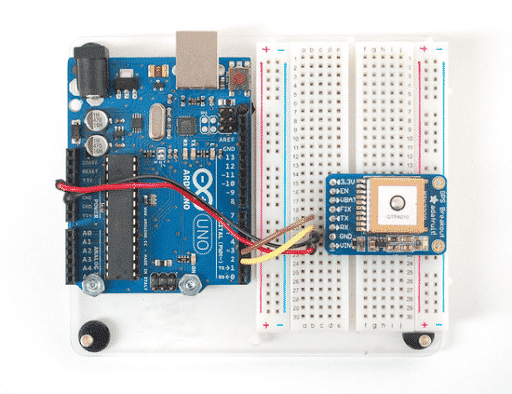
You must connect the breakout to the Arduino using wires and a breadboard (image courtesy of Adafruit).
Sometimes, apart from using jumper wires to connect the breakout to the Arduino, you may also need to do a bit of soldering, like I had to do for the GPS Breakout. Here’s the quick version of how this soldering job went (you can see me soldering the Adafruit GPS breakout in the fast-motion video below).
The beautiful thing about breakouts is that unlike shields, which only work with the Arduino, a breakout can be connected to anything, including the boards that you will design your self down the track. Therefore, apart from being used for learning, breakouts can be embedded into a final product.
Components
While breakouts give you easy access to components by putting them on a printed circuit board with their supporting electronics, you will eventually need access to the individual component so that you can fully customize the way it works in your circuit.
For example, if you would like to have a keypad so that the user can type letters and numbers as input to a gadget you are making, you could use a soft membrane keypad. This keypad is available as a component. To use it correctly, you will need to add several wires and resistors.
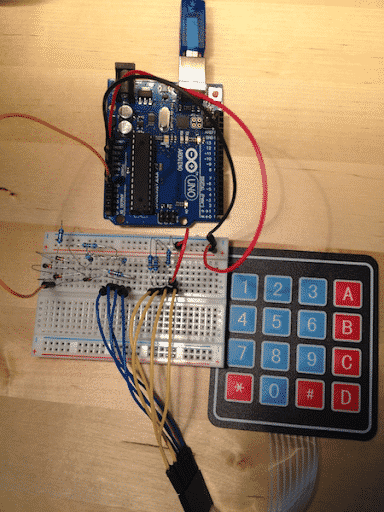
Using a 4x4 keypad requires external wires, diodes, and resistors; this is more work (compared to a shield), but often the flexibility you get in return is worth the effort.
Another example of an individual component is a character LCD screen. To make this one work properly, you have to provide a lot of wires and a potentiometer.
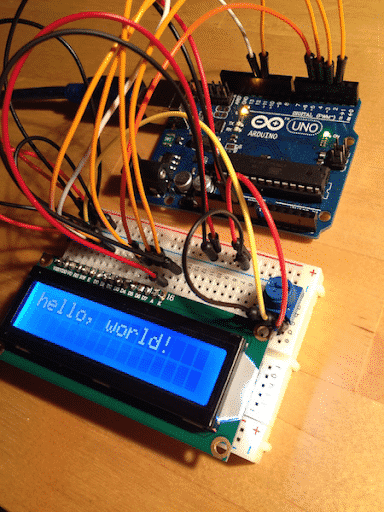
An LCD screen on a breadboard. A lot of wires are used to connect it to an Arduino Uno, on a breadboard with a potentiometer.
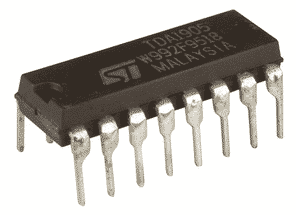
A shift register IC makes it possible to control many digital components with a single pin of your Arduino.
As you become more skilled in Arduino prototyping, you will find yourself using increasingly more components like these. Almost any functionality you can imagine is available as a component. Sensors of all kinds, motion, user input, light, power, communications, storage, multiplexing and port multipliers, binary logic integrated circuits, amplifier circuits, even thumbprint scanners can be connected to an Arduino as components.
Discrete components
At the bottom of the scale, regarding size and complexity, we have a wide range of discrete components. Things like resistors, capacitors, transistors, LEDs, relays, coils, etc. fall into this category. They are the “brick and mortar” of electronics. Most of these discrete components are very simple but very important.
For example, a resistor limits the amount of current that can flow through a wire. A capacitor can be used as a small store of energy or as a filter. A diode limits the flow of current to a single direction. An LED is a diode that emits light. A transistor can be used as a switch or an amplifier. A relay can be used to switch on and off large loads, like an electric motor. A coil can also be used as a filter or as part of a sensor, among other things. There are many more discrete components that the examples mentioned.

A resistor limits the amount of current that flows through a wire.
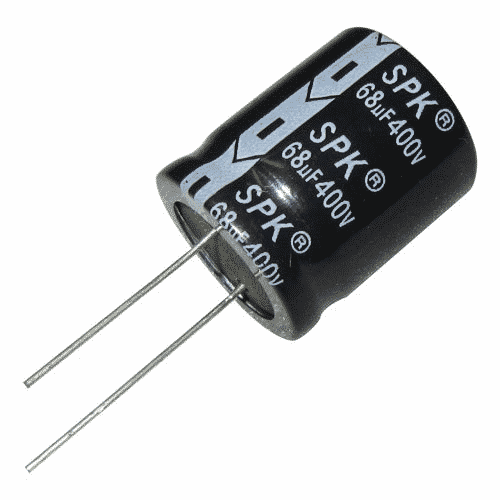
A capacitor stores energy, or works as a filter.
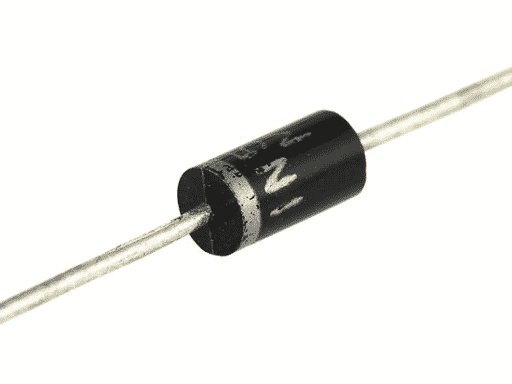
A diode limits current to flow towards one direction only.

An LED is a diode that emits light.
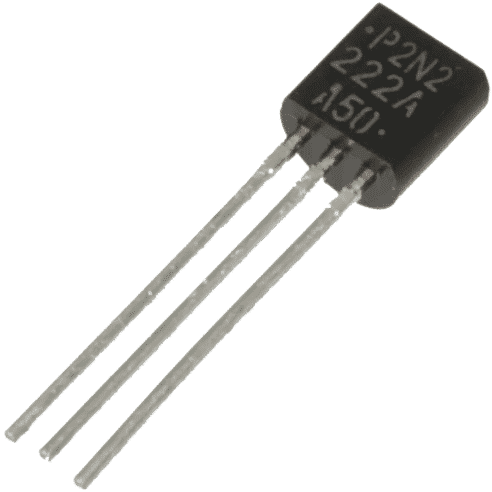
A transistor can be used as a switch or an amplifier.

A relay is used to drive large loads from your Arduino.
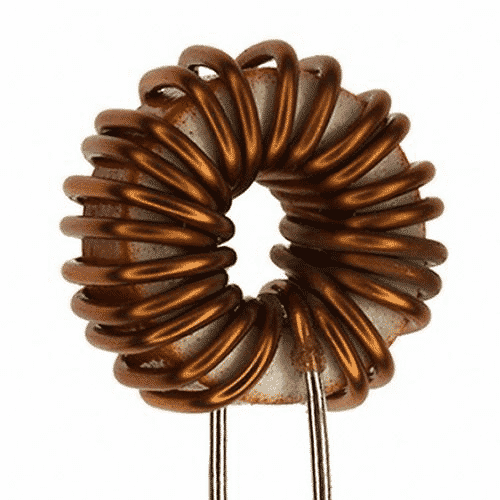
A coil can be used as a filter.
As you are starting your electronics adventures, no matter which Arduino you choose, you will need to stock up on these components as you will need to use them in virtually everything you make. Luckily, they are very cheap, and it is worth buying them in bulk so that you always have some when you need them.
Now that you have a better understanding of the type of hardware that you can connect to an Arduino board, you are ready for the next installment of this short course. In the next lesson, you will learn how to install the Arduino programming environment on your computer and its basic features.
New to the Arduino?
Arduino Step by Step Getting Started is our most popular course for beginners.
This course is packed with high-quality video, mini-projects, and everything you need to learn Arduino from the ground up. We'll help you get started and at every step with top-notch instruction and our super-helpful course discussion space.
Jump to another article
1. What is the Arduino?
2. Common Arduino boards
3. Types of hardware that you can connect to an Arduino board
4. The Arduino programming environment
5. Arduino libraries and how to install them
6. The basics of Arduino programming: program structure, functions, variables, operators
7. The basics of Arduino programming: Loops, conditions, objects, inputs & outputs
We publish fresh content each week. Read how-to's on Arduino, ESP32, KiCad, Node-RED, drones and more. Listen to interviews. Learn about new tech with our comprehensive reviews. Get discount offers for our courses and books. Interact with our community. One email per week, no spam; unsubscribe at any time

